There is a lot of competition out there when it comes to processors and embedded systems. The above image is one example of modern development boards currently available. With the exception of the one on the lower right, all of these boards can be programmed through the Arduino IDE, and through the manufacturers respective tools.
Some of my personal favourites are the trinket and feather boards by Ada Fruit. These boards are compact can be easily placed into a bread board and for that reason tend to remain a favourite.
The Atmel now Microchip boards are fantastic, and also work with the arduino ide. Currently there are boards for several processors including the 328pb, Sam D10, and the tiny104. The Xplained line makes for a great set of development boards.
Last to note are the arduino boards from Arduino.cc with a wide selection there are the standard size board which is a form factor that can accommodate a variety of what are called shields, a stack-able circuit board.
Various suppliers are around for Arduino and compatible boards. To list some:
Arduino.cc
Robotshop.ca
Ada Fruit
SeeedStudio
Showing posts with label arduino. Show all posts
Sunday, October 15, 2017
Tuesday, August 10, 2010
OBD-II interface
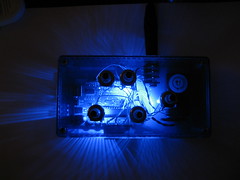
As part of a larger project I have completed an ELM327 interface. The board is very simple and a rough image of the end product is posted bellow. The main project can be found here as part of the OBDuinoInterface or OpenGauge project.
Labels:
arduino,
arduino mega,
atmega2560,
BPM Driver,
BPMDriver,
ELM327,
OBD-II,
OBDuinoInterface,
OpenGauge
Monday, June 22, 2009
Noise Maker Time
I will be teaching a small introduction to AVR / Arduino class at the Niagara Artist Company this summer during the first week of August (rescheduled from the 4th of July weekend).
I have decided to use this as the foundation to the lecture:
Tinker.It Arduino Synth
This device is fun to say the least. Although I found you need an op-amp to really make it shine. I have a surface mount board available for anyone who is interested, just send me an email and I can send you one for $2 + postage. The board uses SMT / SMD parts (surface mount) but it really makes the tinkerit board scream like it should using an OP275GSZ op-amp from Analog Devices. This device gives a clean amplification at 5v with no additional parts, talk about easy to use.
I think the thing most enjoyable about this project is the hack-ability. You can edit the code to make different sound grains, you can add distortion and other effects, as I am doing, look here for some easy single sided board projects TonePad FX.
Labels:
arduino,
arduino class,
brian durocher,
diy,
electronics,
grain table synth,
OP275,
synth,
tinkerit
Tuesday, August 5, 2008
Return to the Bronome
So I recently found a fellow artist working in France who is also working on an RGB Monome like project. He calls it the Trinome and his webpage is here. LiveInterface There you will find a complete resource for the code and a schematic. However I am currently working on a backpack to control the leds. I will be creating complete PCB's for this project once it is completed. I am unsure as to the direction Julien is taking with his project, however, I wish to push this device to its limits and even integrate even more functionality as a controller. I have always intended on this device being a stand alone controller. But Julien's use of the Monome Protocol (OSC) though USB is also interesting.
Bronome Schematic - Julien's schematic with a partially finished backpack and arduino.
Thursday, April 10, 2008
Fritzing.org
Today I downloaded the Fritzing application again to see the progress this application has made in development. It is finally at a usable state for small projects, it is particularly good for the beginner as it accurately reflects the equipment you would be using.
Fritzing.org
Fritzing.org
Wednesday, March 5, 2008
TEMT6000 Light Sensor Breakout

Today I took some time to develop the TEMT6000 break out board for one of my projects using Eagle Cad. Its a small little board which uses surface mount parts 2x 10k Ohm resistors and 2x TEMT6000 light sensors. This breakout board is for a much larger project involving performance and audio.
The file can be found here:
Breakout PDF
I used PDF format for the actual file as its easy to print at the correct sizes for multiple systems.
Enjoy!
Labels:
arduino,
breakout board,
light sensor,
temt6000
Thursday, February 28, 2008
Bronome Brain


I have been working on the Bronome switch system which is based on 74LS164 and 74LS165 shift-in / shift-out registers. I have yet to write the code to handle these things but two such brains have been built. Additionally here are some images of the build of the Bronome.
Labels:
74ls164,
74ls165,
8x8 button matrix,
arduino,
bronome
Thursday, February 7, 2008
Bronome Prototyping
Today I started to tackle the LED routines. Right now its still really crude as I am borrowing a large section of the code base from other sources. I am not happy with the speed at which it is executing so I am going to rewrite a lot of it and perhaps use assembler. Here is the latest video:
Please excuse the documentation of code, that was more for my record.
Labels:
arduino,
bronome,
midi interface,
performance art,
trinome
Tuesday, February 5, 2008
Why Bronome?
The Bronome project has been designed to address some of my personal performance audio needs. I saw a need for something more than just a USB interface something which could also act as a hardware midi controller. In that respect the Bronome is a brother to many other projects such as the Monome, Tonori-on, and MidiBox. It borrows concepts and ideas from all to make a unique interface onto its own. Although the initial facade is very much like the minimalist Monome 40h, the differences are in its use of light to convey meaning. Through visual means the interface of the Bronome can mutate or transform into a multitude of utilities, keyboard, sequencer, or display. The configurations are endless.
If you would like to participate in this project either through coding, graphics, ideas or suggestions, send an email to Brian Durocher.
Monday, February 4, 2008
Sunday, February 3, 2008
Bromome Stage 2 (RGB Monome Derived Interface)
A few more parts arrived from my favorite supplier and I was able to wire everything up and get it working on a very basic level. The next stage will be switch/button implementation and LED reaction to button presses. I am not totally sure if i am going to use the Monome code base or just create my own assembler version. Regardless here is the video.
Labels:
arduino,
bronome,
electronics,
midi,
monome,
performance art
Tuesday, January 15, 2008
Cardboard ADSR and RGB 40h brOnome
Two new projects are in the works, the first is the ADSR (Attack Decay Sustain Release) module for the modular synth I am building to use in performance art. This project was a build from the ADSR on the Music From Outer Space Webpage, by Ray Wilson. If you have not seen this webpage you really do need to check it out.
The second project which has just started as of today is the RGB monome 40h. I am temporarily calling it the brOnome. Some more research needs to be done to determine the correct way to implement the RGB Leds with PWM functionality. Its just a matter of time before this one comes together. My plans are to loosely base this project on the monome 40h. In essence I want to make something that not only functions as a monome but also does a lot more. Something like a [Tonorion / Monome]-megasord.
Friday, December 28, 2007
Synth_Tastick!!!!!!!
So I haven't posted for a while. Here is why:


I have been working on putting together a synth with the ICL8038 chip. Right now its just a collection of voltage controlled oscillators. The second board is my first attempt at a midi in port. At the heart of the project I will be using an Amtel ATmega2560. I will keep everyone posted on the progress.


I have been working on putting together a synth with the ICL8038 chip. Right now its just a collection of voltage controlled oscillators. The second board is my first attempt at a midi in port. At the heart of the project I will be using an Amtel ATmega2560. I will keep everyone posted on the progress.
Labels:
arduino,
atmega2560,
diy,
electronics,
ICL8038,
midi,
synth
Tuesday, November 13, 2007
Pot's and not the ceramic kind.
I have been making interesting sound devices for my art works as of late. And I figured I would share some of my findings with all of you. Some basic electronics tutorials can be found on Pots which are used in a number of applications for the Arduino.
The Atari Punk console project a Synth Project and a few other projects including an ICL8038CCPD project with Sine Wave, Triangle Wave and Square Wave out.
I started with the Music from Outerspace synth project and I have to admit it was difficult for a first timer. The Atari Punk was a much easier project to build. However now after building the ICL8038 project I am getting quite confident in my abilities and intend on doing some performance art with them.
I will post images shortly.
The Atari Punk console project a Synth Project and a few other projects including an ICL8038CCPD project with Sine Wave, Triangle Wave and Square Wave out.
I started with the Music from Outerspace synth project and I have to admit it was difficult for a first timer. The Atari Punk was a much easier project to build. However now after building the ICL8038 project I am getting quite confident in my abilities and intend on doing some performance art with them.
I will post images shortly.
Powered by ScribeFire.
Labels:
arduino,
art,
atari punk,
audio art,
electronics,
ICL8038,
pots,
sound,
synth
Thursday, October 18, 2007
Processing
The brains behind the wonderful, easy to use, and open, Processing programming language have just realsed an update. Processing is now at version 127. I can not stress how much I love this intitiative. Processing can be used with the Arduino to make interesting interactive works of art.
Labels:
arduino,
beta,
Processing,
Processing.org,
programing,
programming
Monday, October 15, 2007
Arduino Workshop - Update
This weeks Arduino class will be canceled. However, class' will continue the following week.
Additionally the Arduino class will be expanded to cover programming with Processing.
These two systems can also be used in tandem to create interactive works that exist in both a physical and digital world. Hybridize your projects.
Lets collaborate.....
Additionally the Arduino class will be expanded to cover programming with Processing.
These two systems can also be used in tandem to create interactive works that exist in both a physical and digital world. Hybridize your projects.
Lets collaborate.....
Labels:
arduino,
arduino class,
art,
contemporary,
creative,
ontario,
st. catharines
Friday, October 5, 2007
Textile Arduino

After being inspired by various Arduino projects I have decided to make a wearable LED based art piece, by incorporating traditional textiles used through antiquity, leather, AVR, and LED's. Leah Buechley's work with Textile based micro-controllers is a great inspiration to me. Her line of textile Arduino's called LillyPads have just been released through SparkFun Electronics.
Here are two images of my ATmega168 connected to leather. The horrible solder job is actually deliberate and is intended to act as a stop for the conductive threads attached to the pins of the integrated circuit. After stitching towards the IC come up with the needle from under the IC, wrap the conductive thread around the pin with the solder bead then make a knot. The hold is very secure. (I will post a drawing of how I tie my knots). I chose leather because of its thickness and rigidity. The likelihood of the leather folding over is also minimal which reduces short outs between traces. It is harder to work with and you need special needles, however, these are often inexpensive and readily available in most art supply stores (ie. Micheal's). The use of an IC socket is recommended for two reasons, first, you can remove your AVR from your project to reflash it using an ISP programmer. Second, you will need to bend some of the sockets pins and use the other unused pins to secure the IC socket to the leather. On the reverse side of the leather you will bend the remaining IC pins. Use an exacto knife to puncture holes through the leather, this will allow for easy socketing of the IC socket onto the leather.
Labels:
arduino,
art,
brian durocher,
durocher,
electronics,
fine art,
led,
lillypads
Thursday, September 27, 2007
AVR Weaerable Continued
Stage two of the wearable project is completed. I have the micro controller off the Arduino board and running on its own. There is a slight flicker issue and I am not entirely sure what is causing it. Perhaps the 8 mHz Clock speed is two slow for a clean transition between colors.
Labels:
arduino,
art,
electronics,
textile arts,
wearables
Monday, September 17, 2007
Arduino Workshop
This Thursday from 7:00 to 8:30 an Arduino workshop will be held at my studio #2, 3rd floor @Rodman Hall. The workshop will be informal and the main topics will cover the potential use of the Arduino board in visual arts. No experience is required, and a collaborative approach to developing interesting projects will be discussed and pursued.
http://www.arduino.cc/
or you can
Order One
http://www.arduino.cc/
or you can
Order One
Subscribe to:
Posts (Atom)